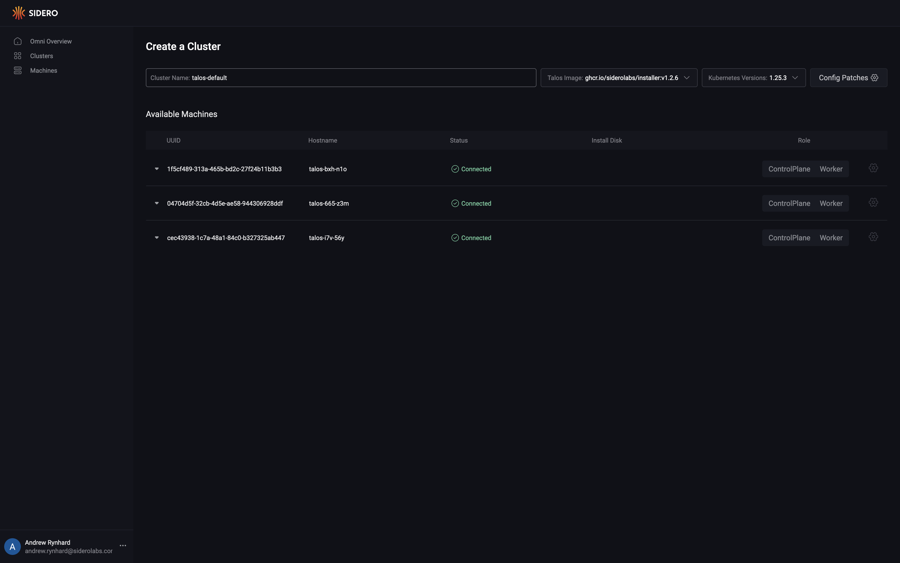
Create a Cluster
This guide shows you how to create a cluster from registered machines.
First, click the “Clusters” section button in the sidebar. Next, click the “Create Cluster” button.
You may name the cluster, as well specify the version of Talos Linux and Kubernetes that the cluster should be created with. You may also enable optional cluster features, such as Disk Encryption or Workload Service Proxying.
Note that disk encryption can only be enabled during cluster creation. Enabling this checkbox will configure the cluster to use Omni as a Key Management Server, and local disk access will not the possible unless the machine is connected to Omni.
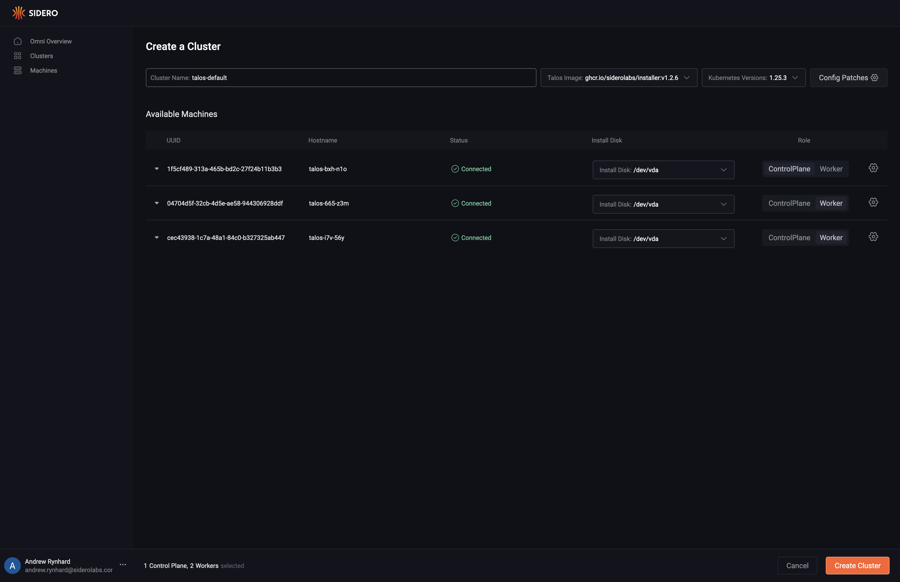
Select the role for each machine you would like to create a cluster from. Now that each machine has a role, choose the install disk from the dropdown menu for each machine. Finally, click “Create Cluster”
Create a file called cluster.yaml with the following content:
kind: Cluster
name: example
kubernetes:
  version: v1.27.0
talos:
  version: v1.5.2
---
kind: ControlPlane
machines:
  - <control plane machine UUID>
---
kind: Workers
machines:
  - <worker machine UUID>
---
kind: Machine
name: <control plane machine UUID>
install:
  disk: /dev/<disk>
---
kind: Machine
name: <worker machine UUID>
install:
  disk: /dev/<disk>
If enabling optional features such as disk encryption, add them to the Cluster document e.g.:
kind: Cluster
name: example
kubernetes:
  version: v1.27.0
talos:
  version: v1.5.2
features:
  diskEncryption: true
Note
Be sure to update the UUIDs and install disks with the UUIDs and disks of the machines in your account.
Now, validate the document:
omnictl cluster template validate -f cluster.yaml
Create the cluster:
omnictl cluster template sync -f cluster.yaml --verbose
Finally, wait for the cluster to be up:
omnictl cluster template status -f cluster.yaml
Create a file called cluster.yaml with the following content:
kind: Cluster
name: example
kubernetes:
  version: v1.28.0
talos:
  version: v1.5.4
---
kind: ControlPlane
machineClass:
  name: control-planes
  size: 1
---
kind: Workers
machineClass:
  name: workers
  size: 1
---
kind: Workers
name: secondary
machineClass:
  name: secondary-workers
  size: unlimited
Be sure to create machine classes control-planes, workers and secondary-workers beforehand. See machine classes how-to.
Now, validate the document:
omnictl cluster template validate -f cluster.yaml
Create the cluster:
omnictl cluster template sync -f cluster.yaml --verbose
Finally, wait for the cluster to be up:
omnictl cluster template status -f cluster.yaml