Register a Hetzner Server
This guide shows you how to register a Hetzner server with Omni.
Dashboard
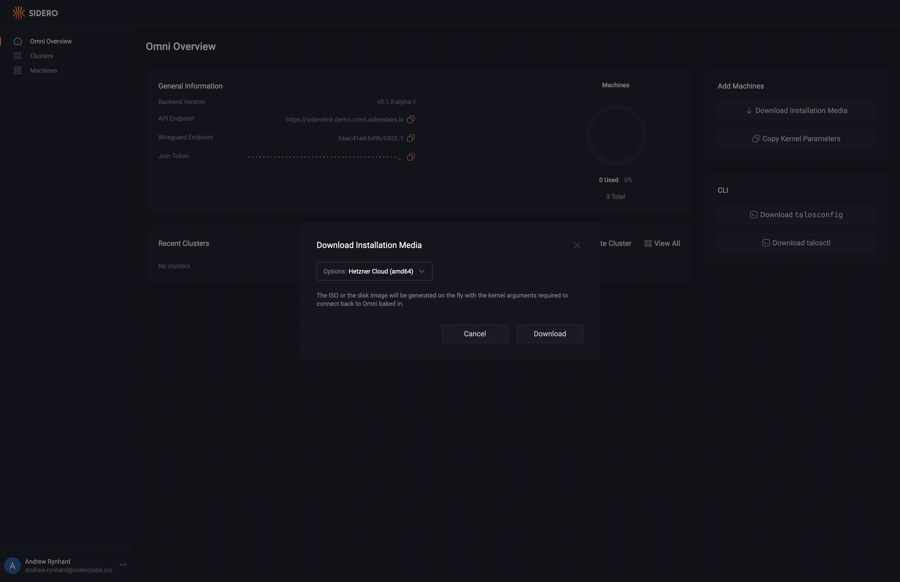
Upon logging in you will be presented with the Omni dashboard.

Download the Hetzner Image
First, download the Hetzner image from the Omni portal by clicking on the “Download Installation Media” button.
Now, click on the “Options” dropdown menu and search for the “Hetzner” option.
Notice there are two options: one for amd64 and another for arm64.
Select the appropriate option for the machine you are registering.
Now, click the “Download” button.
Place the following in the same directory as the downloaded installation media and name the file hcloud.pkr.hcl:
packer {
  required_plugins {
    hcloud = {
      version = ">= 1.0.0"
      source  = "github.com/hashicorp/hcloud"
    }
  }
}

locals {
  image = "<path to downloaded installation media>"
}

source "hcloud" "talos" {
  rescue       = "linux64"
  image        = "debian-11"
  location     = "hel1"
  server_type  = "cx11"
  ssh_username = "root"

  snapshot_name = "Omni Image"
}

build {
  sources = ["source.hcloud.talos"]

  provisioner "file" {
    source = "${local.image}"
    destination = "/tmp/talos.raw.xz"
  }

  provisioner "shell" {
    inline = [
      "xz -d -c /tmp/talos.raw.xz | dd of=/dev/sda && sync",
    ]
  }
}
Now, run the following:
export HCLOUD_TOKEN=${TOKEN}
packer init .
packer build .
Take note of the image ID produced by by running this command.
Create a Server
hcloud context create talos

hcloud server create --name omni-talos-1 \
    --image <image ID> \
    --type cx21 --location <location>
Warning
Machines must be able to egress to your account’s WireGuard port and port 443.Conclusion
Navigate to the “Machines” menu in the sidebar. You should now see a machine listed.
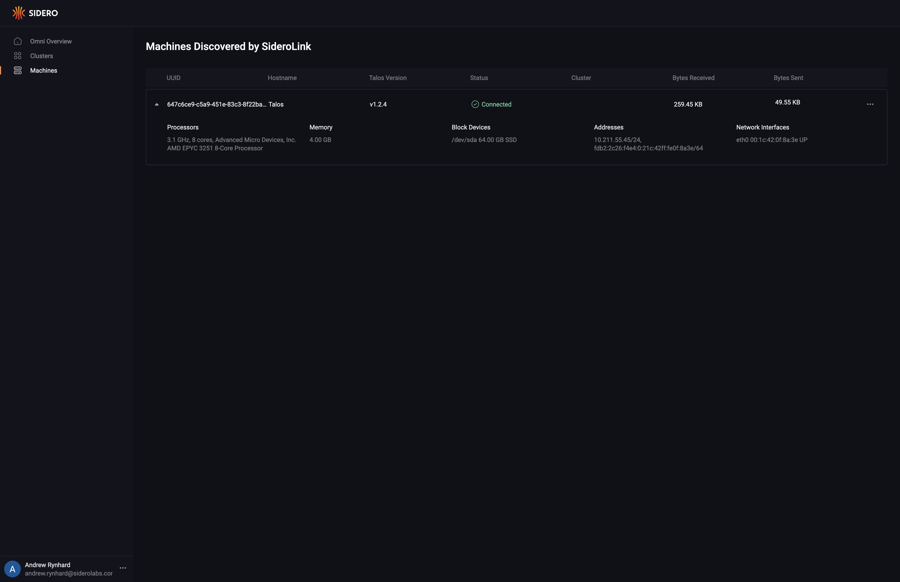
You now have a Hetzner server registered with Omni and ready to provision.